Jump to content
Vari-Lite Controls Support Forum

Jon Hole

Vari-Lite Admin
  • Posts

    2,546
  • Joined

  • Last visited

  • Days Won

    43

Everything posted by Jon Hole

  1. Hi Eric, ZerOS only supports Qwerty keyboards currently. As we discussed last year, I've added your request to our log
  2. Hi Nigel, We're currently on schedule to release ZerOS 7.9.6 in a matter of days, not weeks (although, as always, schedules can change last minute if we're suddenly made aware of any issues.). We have an updated manual which will be released at the same time. As Edward mentions above, ZerOS 7.9.6 is mostly enhancements and bug fixes.
  3. Hi Romain, No - adding a ZerOS Wing will not increase the number of fixtures that FLX S24 can control. Salut romain Non - l'ajout d'une ZerOS Wing n'augmentera pas le nombre de luminaires que le FLX S24 peut contrôler.
  4. Hi Tapani, Hold SETUP and press the flash button below the Playback fader. Click "Raise and Lower" along the top. You can either reduce the "Trigger/Release Level" to 0%, or you can disable "Release on Lower". I suggest changing the "Trigger/Release Level".
  5. Hi drscoop, The PLASA training sessions will be a "scaled down" version of the standard Zero 88 training, lasting either one or two hours (depending on the session you choose). Each one will have approx 15 minutes time afterwards for Q&A. I'm sure if you pop by the stand with your laptop, one of us will be able to spend 10 minutes with you answering any questions you have. The stand is usually quieter towards the beginning or end of the day.
  6. Not currently. We’re keeping an eye on Apple’s Project Catalyst (universal apps for iOS, iPadOS and macOS) to see how well it’s adopted and what challenges developers face.
  7. Hi Bramblefly, I'm assuming you mean you've just added them from the built-in library (via "Add Fixtures")? To remove these, just go to SETUP (so you're viewing the "Fixture Schedule") and then either: 1) Select the DMX address of one of the fixtures you want to remove, and in the popup window click "Delete Fixture" 2) Select the two fixtures you want to delete (using the channel buttons) so you don't see any other fixtures listed within the Fixture Schedule and then press they physical DELETE button on the console Hope this helps,
  8. Not permanently, but you could park fixtures?
  9. Yes you can - in the same way you’d type “RECORD x GO” or “DELETE x GO”, with x being the cue number and GO being the button of the Playback, you do the same for COPY. So press COPY, type the source (“from”) cue number, and press the playback button, and then type the destination (“to”) cue number, and press the playback button. You can also copy whole Playbacks in just three button presses (COPY GO GO - with the first GO being the source and the second being the destination). Lots of people (including me) use this as a method of creating a “backup” of the stack before doing something which might not work (for example, during Edinburgh Fringe this year, we used Phantom to turn an ETC EOS showfile with approx 80 cues into a ZerOS showfile with over 200 cues by copying, updating, inserting etc, so at regular intervals I copied the Master Playback to other empty playbacks. Also worth remembering you can use THRU and AND when copying cues. You only need to define a single cue in the destination - any point cues or numerical gaps etc will automatically be included in the new destination cues
  10. Ah yes, I should have mentioned that too - thanks Kevin!
  11. Don’t try turning the encoders, click and then use a straight line motion to move them (remember the middle of the encoder is a separate button, so click around it). It’s something we’d like to improve in the future. The Colour Palettes are referencing, so if you record “blank” palettes (I’d suggest pressing “home” first, so RGBL are all “tagged” and hence recorded into the palette) you can record your cues with references to the palettes, and then just update the palettes when you’re in the venue (presumably you’d have to do this anyway, blind programming colour, even with the best visualisers, is near impossible to get right first time). (Another option, depending on the theatre, is to program in 5ch mode, and when you’re in the venue change the mode using RDM. You can then use the “revert rig” feature to put it all back at the end of the run)
  12. Is there a reason you need the fixture in 6ch I-RGBL-S mode rather than the default 5ch I-RGB-S mode? This will allow you to use the colour picker, Mood Boards, etc
  13. Hi, The default mode for these units is “5 channel” mode. This allows the console to send the fixture RGB values, and for the fixture to decide how best to create that colour using the LED chips available to it. According to their manufacture, this is the recommended way of using their fixtures (which is why it’s set as default). Direct mode allows you to access each chip individually - and on FLX we let you do that via the encoder wheels. There are plenty of downsides to doing this - you don’t get to use all the clever calibration built into the fixture itself, you don’t get to use the FLX colour and image picker, and this mode uses a larger number of DMX channels than the 5 channel RGB mode.
  14. MA3 software hasn’t been released yet, it’s still in “preview” form.
  15. Just to add to this, they’ve only just finalised confirming the GDTF format so we haven’t been able to develop this until recently. Currently I don’t believe there are any console manufacture supporting it, but we are committed to doing so and have started work
  16. Hi, Assuming that Playback 1 is empty, and the moving light is Channel 1: Push up Fader 1 to turn the intensity of the moving light to 100% Change the colour and move the position Press RECORD and then press the MASTER GO button (this records Cue 1 onto the Master Playback) Pull down Fader 1 to turn the intensity of the moving light to 0% Press RECORD and then press the MASTER GO button (this records Cue 2 onto the Master Playback) Push up Fader 1 to turn the intensity of the moving light to 100% Change the colour and move the position. Press RECORD and then press the MASTER GO button (this records Cue 3 onto the Maser Playback). Now ensure the programmer is empty (CLEAR CLEAR), and Playback the cues using the GO button. Once in Cue 2, after a few settings, you should see the moving light automatically move, so when you press GO to go into Cue 3, the Position and Colour are already correct
  17. I guess a way of thinking about this is “simple” (touch) and “advanced” (syntax) options. Using Syntax, the Record Window gets given clues as to what you’re going to do (by typing COLOUR 1) before you do it (by pressing ENTER). This allows the record window to apply filters it believes to be suitable, and allows you to overrule them. Using touch, everything happens in one go - there’s no opportunity for the user to overrule the standard filters. It’s much more common that a user wishes to just record Colour, even though multiple parameters are tagged (or Smart Tag is enabled), so this feels like the best way, currently, of dealing with the situation.
  18. You can download Phantom ZerOS from the same place as the console version. Click “Download” and then choose the Phantom version from the files available
  19. We do not publicise how to access hidden features such as this, sorry.
  20. Bonjour, À l’heure actuelle, le FLX S permet uniquement d’appliquer un effet à l’ensemble du projecteur, et non à des cellules individuelles. Hello, The FLX S currently only allows an effect to be applied to the whole fixture, not individual cells.
  21. Thanks Jolyon, please email all that information, including the attachment, to the team so they can create it for you.
  22. If you email us, as per the above instructions, we can get it made for you
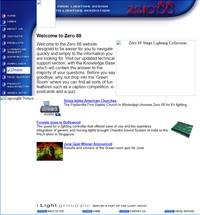
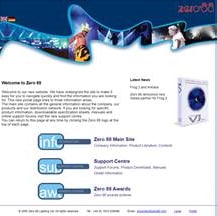
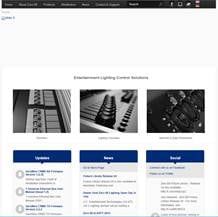
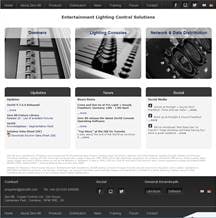
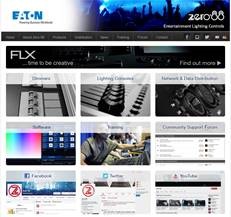
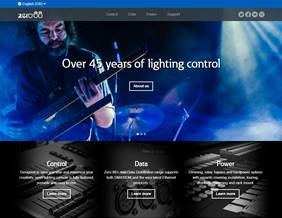
  23. Completely agree, which is why we're trying to bring it all together onto the new website. This will happen in phases, but the end goal is a single website, with a single search function. However, the website is also a marketing tool - so current product will always take "pride of place" and have all the pictures etc! Legacy products will then be listed as-per the screenshot above. Glad you think we're going in the right direction! Many of the images are currently "full res" rather than "web quality", so once we change those that should help. Some pages which are picture heavy will have some elements that won't be displayed on the mobile version, which will hopefully also help.
  24. Hi Kevin, We're approx a month away from launching our new website, that sets us up to solve some of these issues: 1) All downloads for current products (such as ZerOS, Fixture Library etc) will be much more simply downloadable directly from the relevant product page, and looks a little like this: 2) Legacy products will be listed and, at start, will link directly to the relevant area of the knowledgeable. Once launched, one-by-one each of these legacy products (all 47 years worth!) will be converted to a "normal" product pages, making all the downloads work exactly the same as current products. The knowledgebase / forum will then not be used for any downloads what-so-ever. 3) We plan to transition the knowledgebase over to the new website as a Phase 2 development. Eaton's nanorep platform was a significant improvement over our old knowledgebase, but the search, URL structures and breadcrumbs just aren't performing how we were promised or how we'd like, so we'll bring it all back in house! Our beta testers can see how the website's coming along via the link within the beta forum.
  25. Dear All, Zero 88 Fixture Library version 38 has now been released. For full information, please visit: http://zero88.com/software/library This release contains 10380 fixtures from 360 different manufacturers. For a list of fixtures in the library please click here. The library is released in 2 formats: Full version for desks running ZerOS software (ORB Series, Solution series, FLX Series, and Leap Frog 48 & 96). Filtered version for other Zero 88 desks. This removes data that is not used by these other desks, so that the file is smaller. When using a floppy disk (original Frog series, Illusion 500) it is recommended that the floppy disk be freshly formatted before using it. Download & Installation The correct format of the library for your desk can be downloaded by clicking the product name below. The library (.ift file) should be placed in the root directory of the floppy disk or USB stick. ZerOS desks (FLX, FLX S, ORB Series, Solution series and Leap Frog 48 & 96) To load this file into your console extract it to the root of a USB stick and plug into your console. Then tap SETUP, tap "Load File", then select the GFT.ift file. FROG2 To load this file into your console extract it to the root of a USB stick and plug into your console. Then tap SETUP, tap "Load File", then select the GFT.ift file. JesterML & JesterTL The fixture library is installed on the desk at manufacture, however this can be updated from USB if required in Setup -> Update Fixture Lib -> Update Library. Frog Series and Illusion 500 Use 'Common Fixture Manager' (included in the Fixture Tools download) to select the fixtures you wish to use, and save this as a file to a floppy disk. Diablo The fixture library is used with the Diablo Fixture Manager PC software. Sirius 250/500 Use the Fixture Type Editor to import fixture types from the fixture library, and then use the ‘Export Sirius UFT’ function (under the ‘File’ menu) to generate data in the correct format for the Sirius 250/500. Further details of assigning fixtures on the desk to fixture types in the fixture library can be found in each desk’s operating manual. Additional Fixtures If you need a fixture type which is not in the library, please read the following thread:
×
×
  • Create New...

Important Information

We have placed cookies on your device to help make this website better. You can adjust your cookie settings, otherwise we'll assume you're okay to continue.