

Kirkup_xp
-
Posts
1,070 -
Joined
-
Last visited
Posts posted by Kirkup_xp
-
-
Hi Ryan
You load it using the LOAD USER FIXTURES button in SETUP/FILES.
Or you can update your library with the new fixture library release, release 23, which has just been released. This will include the Mac 350 Entour.
I hope this helps,
Peter
-
Hi Erik
The issue number is ZOS-1246.
It has not yet made it to the top of the list, but it's on there... Once we've got some progress, we'll let you know.
Peter
-
Hi Aniaki
Thanks for spotting this - i've updated the download, so it should be working correctly now.
The link is http://common.zero88.com/public/files/LeapFrog48_96_QuickStart_Issue1_French.pdf if you want to grab it directly.
Please let us know if you need any further assistance,
Thanks,
Peter
-
Hi Robbie
The latest version for the original Frog series is 10.12 - see this page for info.
These files are ready to copy onto a floppy drive (after unzipping) and then be installed directly on the desk - see the release notes for details.
I hope this helps,
Peter
-
Hi Oysterbandit,
Your desk is covered by a 3 year warranty, so should the problem come back then please do let us know and we can get the part replaced for you. If you have an urgent requirement for the desk on the show, i'd recommend keeping it as we can't guarantee repair timescales at the moment.
I hope this helps,
Peter
-
Hi Oysterbandit
Can you boot the desk into test mode and try out the beamshape button? To do this, boot the desk with the SETUP key held down, until your monitor screen shows an image of the front panel of the desk. Once you see this, push each button in turn and you should see a response on-screen. It's possible that the Beamshape key isn't working for some reason.
If you need help doing this, or find that this is the case, please call Keith on 01633 833100 - he'll be able to point you in the direction of getting the desk replaced.
I hope this helps,
Peter
-
Hi Stefan
The reason you're seeing this is because the 'additional submasters' are actually just 'channels' and so are tagged and in the programmer when you are modifying them. Therefore when you update a submaster, you are then including the information, making it difficult to remove it.
The answer would be to untag (remove) the channel data from the submaster by holding CLEAR and pushing the flash button under it before recording or updating that submaster.
The other option would be to use LOAD to update the subs, which would avoid the 'channels' having to be up.
Please remember that this is not an 'officially supported' feature, so the interface may not be as clean as some other features on the desk.
I hope this helps,
Peter
-
Hi Pablo
Unfortunately the Jester ML series do not provide proportional control over the attributes like you described. One option would be to patch the fixtures as simple dimmers instead of RGB devices (you'll need 4 buttons per fixture, or 4 faders) and then program each submaster as follows:
1 - Red and Dimmer at full
2 - Green and Dimmer at full
3 - Blue and Dimmer at full
I hope that this helps,
Peter
-
ZerOS version 7.0 is launching soon, and right now, we're looking for beta testers to try out the new software.
If you have a ZerOS console and are willing to try out some of our new features and provide feedback, please get in touch via PM - the software is a major upgrade for ZerOS and includes a number of really exciting new features. I can't say too much here yet, so if you want to know more, let me know!
Peter
-
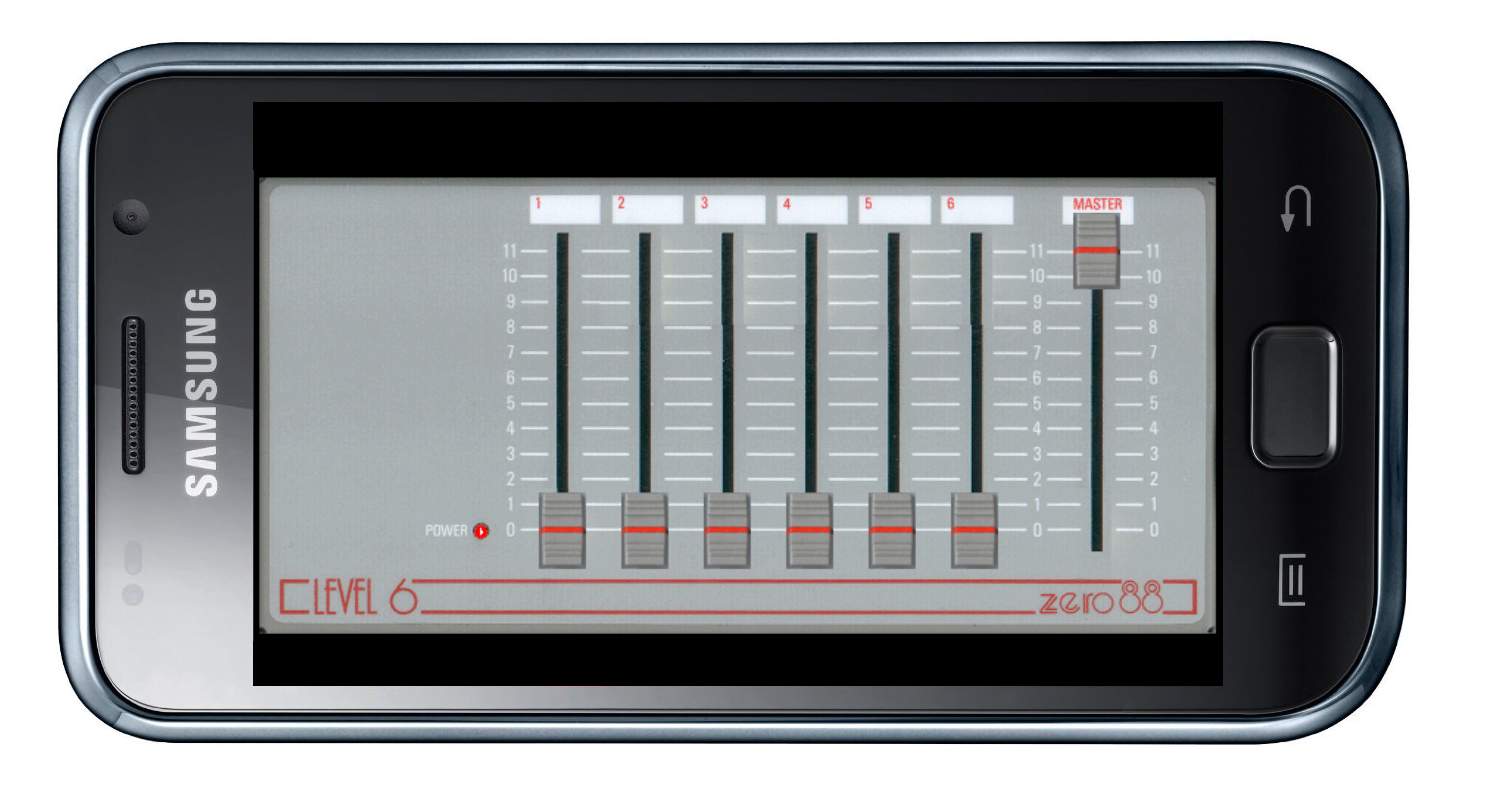
Cooper Controls are pleased to announce the launch of their new Android Remote for Level 6. Following the fantastic feedback for their ZerOS Remote for Android application launched last month, Zero 88 have developed a method for controlling their entry level control product, the Level 6 DMX, using an Android mobile device.
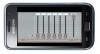
The Level 6 Android Remote enables control of channels 1, 2, 3, 4, 5 and 6, together with a Grand Master function. As an added feature, controls on the Level 6 Android Remote go to 11, for when you need that extra brightness.
As the Level 6 DMX does not support networking, the engineers at Cooper Controls have designed a method for communicating between the Level 6 and the Android tablet. This new technology, known internally as the Human Android Neurological Device (H.A.N.D.), provides the optimum interface for linking the operator directly to the Level 6 DMX. An expandable design, multiple H.A.N.D.s can be utilised to grow your system to control more lights, along with multiple Level 6s. For professional lighting designers, an accessory for H.A.N.D. has been developed – the Growing Lx Operators Vast Ego (G.L.O.V.E.). By using G.L.O.V.E, professional designers can take a truly ‘H.A.N.Ds off’ approach.
For extremely large systems, it may be preferable to order an Android Sustaining Support Instance (Student) To Automate Neurological Transfer (A.S.S.I.S.T.A.N.T.) to provide a distance between the Android and the Level 6. A.S.S.I.S.T.A.N.Ts are now available from all major drama colleges, and come with a 3 year ‘return to base’ warranty. In the event of malfunction, simply send your A.S.S.I.S.T.A.N.T. back to their origin for reprogramming.
You can download the Level 6 Android remote from the Android Marketplace from April 1st.
-
Hi Kev
We have been working on getting the APR screens to work, and infact have one in our office, however the implementation is more complex than any of the other touchscreens we have seen. At the moment this is still scheduled to be examined before the next software release, but I can't make any promises due to the complexity of the driver implementation.
I'm sorry that we've had such issues with this screen - if you're on a short timescale, you might want to consider selling the screen and buying another - we've recently purchased a few Iiyama ones which seem to work very well.
Kind Regards,
Peter
-
Hi Sara
Is it possible that some channels are set in different areas to others? The panel will be set to an area number, so could only be controlling the channels in that area.
Also, are all of your channels on one dimmer? If not, you need to capture the scene onto each of the dimmers in turn.
I hope this gives you something to look into - let us know how you get on, and if you need any further help.
Peter
-
On your iphone select your wifi network, press the little arrow icon, select static set ip to 192.167.0.47, subnet 255.255.255.0
on the desk enable the remote, set the ip to 192.168.1.30 subnet 255.255.255.0
I think Kev meant the IPs to be
192.168.0.47
192.168.0.30
In Kevs example above, the remote should *not* work... the IP addresses need to be within the same range.
-
Hi Vadim
Can you confirm which mouse you are using? Does the rest of the desk work correctly?
Thanks,
Peter
-
Hi Steve
This is most likely due to the DMX implementation on the scanner expecting a different DMX timing from that of the Jester. The Jester outputs DMX at a reasonably fast rate, and my guess is that the implementation inside the scanners probably can't cope with this speed.
You might like to try adding an isolated DMX splitter in-line. Most of these re-process the DMX data, and ouptut it at their own frame rate, which can often resolve issues like this.
If you have access to any DMX test gear, like the Artistic Licence Microscope, then it would be great to try that in-line too - again these re-generate the data.
Let us know how you get on,
Peter
-
Hi Ronnie
When the desk crashes, does it offer to save a debug file to the USB stick when you reboot?
If so, could you send us this, as this contains a lot of useful information in trying to track down what is causing this.
Thanks,
-
Hi there
Can you check whether the DMX is assigned correctly to the fixtures.
To do this, go into Super User (+ and - and ENTER)
Use the arrow keys to scroll to Desk Setup and push ENTER
Use the arrow keys to scroll to Patch Functions and push ENTER
Use the arrow keys to select Manual Patch and push ENTER
Push fixture button 1 - check it is assigned correctly to DMX 25
Push fixture button 2 - check it is assigned correctly to DMX 41
If either of these are wrong, use the + and - keys to set them correctly.
If they will not set to the number you require (the desk will 'skip' over this number) then this means that the DMX addresses are assigned elsewhere. Find the channel or fixture they are assigned to, and push CLEAR to clear the assignment from the previous location, before re-assigning them to the fixture you require.
I hope this helps - please let us know how you get on.
Peter
-
Hi Christian
There are plans to add a feature like this in a future software release, however at the moment all effects parameters are stored together.
Can you upload a show file with the 'bad' effect in it so we can take a look at what might be missing?
thanks,
Peter
-
Hi guys
I should add to this thread, that the reason we've chosen to include the option to delete cues using the inverse sytnax is to help those users who are familar with other syntax methods. Where possible the ORB (and ZerOS generally) will accept most common syntaxes for recording a cue... there are infact quite a few methods to store,name,delete,move etc a cue.
eg, for RECORD, all of these syntaxes achieve much the same outcome:
RECORD CUE 1 ENTER
RECORD STACK 1 CUE 2 ENTER
RECORD 1/3 ENTER
RECORD ENTER
RECORD NAME {my name} ENTER
RECORD CUE 6 NAME {my name} ENTER
RECORD 7 ENTER
RECORD 8 NAME {my name} ENTER
... (ENTER can also be replaced with TIME followed by TIME syntaxes)
There are benefits of following 'standard' syntax, such as RECORD CUE 1 ENTER, DELETE CUE 1 ENTER, etc, but we are very aware that many users come from different consoles which operate with different sytnaxes. As such, we aim to expand our syntax to encorporate as many other options as possible. As explained above, this isn't always possible without 'breaking' some of our syntaxes, so sometimes we have to make compromises, but where we can, we try to help you out.
I hope this helps to clear up our positioning on syntax - please let us know if you spot anything odd, as Jon says, we do listen to all your feedback.
Peter
-
Hi Karl
This is due to the fact that you can record a cue onto a UDK - the syntax to record a cue onto a UDK is CUE n RECORD <UDK> - therefore, we can't assume CUE n RECORD will store your cue.
I hope this helps,
Peter
-
Hi Eric
The remote just needs a contact closure on the Jack plug, between the sleeve and tip of the connector. So any standard footswitch should be able to provide this. Alternatively, it's quite simple to wire a switch in-line and then you can choose whatever type of switch works for you.
I hope this helps - please let us know if you have any questions, and i'm glad to hear your Jester is getting such use!
PS - we do stock the replacement switch, should it fail. Part number is 5356600.
-
Cooper Controls lead the way with an industry first Remote Android App

Cooper Controls are pleased to announce the launch of an Android version of their popular ZerOS Remote application.
Continuing their commitment to mobile device integration, this new app adds to their existing suite of iPhone, iPod, iPad and Windows Mobile applications.
The ZerOS Remote Android app, the first for the entertainment technology industry, allows remote control of any ZerOS console. The app allows users to control their lighting rig from their Android for the first time. From channel levels to playback the ZerOS Remote offers full control of the Leap Frog 48, Leap Frog 96, Frog 2, ORB and ORB XF consoles.
Talking about this latest release Peter Kirkup, Cooper Controls Product Manager explains, “Feedback on the iPhone app we launched last year has been tremendous and we wanted to bring this exciting development to even more of our users. Recent investments from Cooper Industries in expanding our engineering resources made this project possible, and we look forward to announcing further developments in our ZerOS suite in the coming months.”
The ZerOS Remote Android App is available free of charge and can be downloaded from the Android Marketplace today - www.bit.ly/zerosandroid
-
Hi Lordbertie
The app is now available in the Android Market - http://bit.ly/zerosandroid - please let us know how you find it!
Peter
-
Hi Ash
This does sound like condensation - please contact our service department on 01633 833101 and they should be able to assist you with clearing this.
Kind Regards,
Peter
Zero 88 Fixture Library Release 23
in General Discussion
Posted
Zero 88 Fixture Library - Version 23
Contains 2566 fixtures from 179 different manufacturers. For a list of fixtures in the library ... CLICK HERE.
The library is released in 2 formats:
- a full unfiltered version for desks running ZerOS software (Frog 2, Leap Frog 48, Leap Frog 96, ORB).
- a smaller filtered version for other Zero 88 desks. This removes data that is not used by these other desks, so that the file is smaller. When using a floppy disk (original Frog series, Illusion500) it is recommended that the floppy disk be freshly formatted before copying the library onto it.
The correct format of the library for your desk can be downloaded from the relevant product support page.
The files are zipped, and must be unzipped before they can be used. If you experience problems using the built-in zip file functions of Windows XP, then try Winzip. The library (.ift file) should be placed in the root directory of the floppy disk or USB stick.
ZerOS desks (Frog 2, Leap Frog 48, Leap Frog 96, ORB) - The latest fixture library is automatically installed on the desk as part of each operating software update, however this can be updated from USB if required in Setup -> Files -> Update Fixture File.
JesterML & JesterTL - The fixture library is installed on the desk at manufacture, however this can be updated from USB if required in Setup -> Update Fixture Lib -> Update Library.
Frog Series and Illusion 500 - the fixture library should be copied to a floppy disk.
Diablo - the fixture library is used with the Diablo Fixture Manager PC software.
Sirius 250/500 - use the Fixture Type Editor to import fixture types from the fixture library, and then use the 'Export Sirius UFT' function (under the 'File' menu) to generate data in the correct format for the Sirius 250/500.
Further details of assigning fixtures on the desk to fixture types in the fixture library can be found in each desk's operating manual.
If you need a fixture type which is not in the library, then you can create this yourself using the Fixture Type Editor. If you post a link to the manufacturers datasheet on the forum, we will endeavour to add the fixture in the next library release.